How to Test SPI
BMI160 SPI by using
/dev/spidevx.x.The spidev_test code used comes from rm-hull/spidev-test. If you want to get more details about the code, you can check it.
Default setting in the code:
The default device was
/dev/spidev0.0.The default mode were
SPI_IOC_WR_MODEandSPI_IOC_RD_MODE.
You can change these setting on the file spidev_test.c.
1. Building Test Tool
Download the code, please use the following command.
git clone https://github.com/rm-hull/spidev-test
cd spidev-test
gcc spidev_test.c -o spidev_test
2. Check SPI
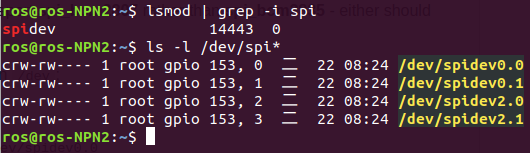
You can confirm whether it is enabled using the shell commands below:
lsmod | grep -i spi
ls -l /dev/spi*
Note
If the devices are successfully installed, they will be installed in /dev.
3. Testing the SPI bus
On the device ROScube Pico NX, we are using /dev/spidev2.0.
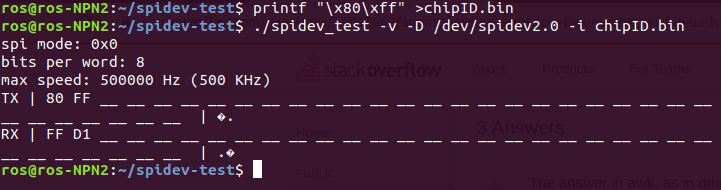
You can check the Chip ID of BMI160 by using the following command below:
Create the file of input data.
printf "\x80\xff" >chipID.bin
Send the file.
./spidev_test -v -D /dev/spidev2.0 -i chipID.bin
Check the received data.
Note
If SPI bus successfully worked, you will received FF D1.
The chip ID of BMI160 is 0xD1.
Note
If you want to get more information about BMI160, click BMI160 Datasheet.